

Last autumn I spent three days on a resettlement housing project in Liuzhou, following the crew from the first floor up to the sixth. Less than thirty percent of the time actually went into "sticking"; the rest was all waiting — waiting for the substrate to dry, waiting for the bonding agent to set, waiting for the first coat of adhesive to key up. When it comes to putting flexible stone on a wall, rhythm tests people more than technique.
This article goes through the process step by step. It does not copy specification clauses; it explains how to arrange the site, where bottlenecks occur, and how to handle them when they do. Design practices vary by region; specific values are subject to drawings and confirmed samples. What I describe is the conventional practice for most projects.
Before entering the site, feel the wall first; don't rush to open the boxes
The first thing I do on site is not look at the sample board; it is to walk the wall with a small hammer and a two-meter straightedge. A hollow spot gives a dull "dong dong" sound, while a solid wall gives a crisp "da da" sound; after walking a dozen or so meters, you can hear the temperament of that section of wall. Once this round is done, I basically have a clear idea of how many people will be needed later and whether leveling needs to be added.
There are not many things to check: hollowing, sanding, flatness, moisture content, plaster age, release agent residue, oil, and loose dust.Plaster ageThis is the most easily overlooked point: a newly plastered wall may look dry on the surface while still being wet inside. I generally do not start work within seven days, and in winter this should be extended further. The method for judging this step is inFlexible stone product categoriesthe technical documents also contain corresponding substrate requirements, which can be checked against.
One project learned this the hard way. The schedule was tight, the general contractor kept pushing to get the panels onto the wall, and the crew started installing as soon as the surface looked white. Three months later, more than twenty panels on one west gable had bulged. When they were pried open, the substrate crumbled with a rub of the hand, and the adhesive had never bonded at all. The rework involved stripping the entire wall and starting over, which was far more expensive than waiting seven more days in the first place.
Panel delivery must also be managed. Use the same batch number and color code on the same wall, and stack panels flat rather than standing them against a wall in the sun. Although flexible panels resist knocks, prolonged exposure to direct sunlight can cause edge warping, so use them up on the same day after opening where possible, and press the remainder flat for storage. LikeSoft porcelain light stone A-01For such regular specifications, calculate the quantity and coverage per box in advance, so you don't find yourself short by two pieces halfway through installation, and replenishment comes from another batch number.

Three hard requirements for the substrate: flatness, strength, moisture content
Measure flatness with a two-meter straightedge plus a wedge feeler gauge, testing in three directions: horizontal, vertical, and diagonal. The conventional requirement is to keep it within 3 mm; internal and external corners must be square, and facade verticality is also held to this same order of magnitude. Sand down high spots; fill low spots in layers with polymer repair mortar. Do not expect adhesive to level the surface—adhesive bonds, it does not level.
Strength is assessed by pull-off testing. Design documents commonly specify not less than 0.4 MPa; on site, small pieces are cut out per inspection lot for pull-off testing, and if the result falls short, treatment is required. When no instrument is available, there is a rough method: scratch the wall with a key; if a deep groove can be scratched and powder falls off, there is basically no need to test—reinforce directly. Treatment options are essentially grinding, chiseling, shot blasting, applying primer plus repair mortar, and for large areas, mesh-reinforced plastering.
Moisture content is generally required to be below 8% to 10%, read by inserting a moisture meter. If no instrument is available, seal all four edges with plastic film and press for 24 hours, then check whether condensation forms inside the film. This is especially important in the south; panels installed during the humid season are prone to whole-sheet bulging the following spring.
Several special substrates must be addressed separately. Aluminum formwork concrete surfaces are too smooth and carry release agents, so they must be roughened or shot-blasted; aerated blocks absorb water extremely quickly, so the primer should be applied twice, and it is best to first apply a thin leveling layer; mesh fabric must be applied at the joints of lightweight partition panels, otherwise the panel joints will be printed onto the finish exactly as they are.
Keep a record after substrate acceptance. Which wall, which day, what pull-off value, and who measured it—write these on the floor plan. If problems arise later, this drawing is the basis, more reliable than memory.
Primer: when it must be applied and when it can be skipped
The primer is not a cure-all, but when it is needed, it cannot be skipped. I have grouped the situations where it must be applied into four categories: dusty or powdery substrates; extremely high water absorption, such as aerated blocks and lightweight wall panels; smooth and dense surfaces, such as aluminum formwork concrete and ground old tile surfaces; and junctions between new and old materials, such as the boundary between repair mortar and the original wall.
In theory, a fresh, clean cement mortar substrate with properly roughened surface does not need priming. But on site it is very difficult to achieve the word "clean." The cost of primer per square meter is almost negligible in the overall construction cost. My advice is to apply it—don't gamble on this.
There are two types. The emulsion type has good sealing properties and is suitable for old walls with uneven water absorption; the cement-based type with sand, commonly known as a roughening interface agent, can create a rough sand layer on smooth surfaces and is suitable for concrete and old tiles. For exterior walls, choose water-resistant and alkali-resistant models; do not make do with interior wall products.
Application is by roller or spray, generally two coats; apply the second coat after the first coat is surface-dry. The judgment criterion is simple: if the back of the hand does not stick or look glossy when placed on it, the panel can be applied. If applied before dry, the panel will slip, the adhesive will be diluted, forming a false bond, and it will sound hollow when tapped. If it dries too much and dust settles on it, it must be treated again.
Do not apply the primer when the temperature is below 5 degrees, it is raining, or there are strong winds of level five or above. If it rains after application, it is as good as not applied at all, and you must wait for the wall to dry completely and start over. This rule is most often violated on projects rushing to meet deadlines in autumn.

Chalk-line layout: the first panel decides everything
Layout is something that no one praises when done well, but when done poorly the whole wall looks awkward. The starting point is usually chosen at the internal corner of the main viewing surface or on both sides of the main entrance, starting with full panels and moving non-full panels to internal corners, rear elevations, or areas hidden by equipment. Both sides of door and window openings should be symmetrical, and strips narrower than one-third of the panel width must not appear at external corners — such a narrow edge does not bond firmly and is also the first place to break.
Run one horizontal control line per floor, hang vertical control lines, and for high-rise buildings set out points with a laser or theodolite. Corners must be closed and rechecked. I have seen cases where a line was snapped on only one side and the other side was off by two centimeters, finally compensated by widening the joint—one joint wide and one narrow, very conspicuous from a distance.
Joint lines must be set in advance. If a large-area exterior wall has no joints, thermal expansion and contraction are all confined within the panel joints, and bulging can be seen after one or two years. Normally, one joint per floor or per the design drawings, with a joint width of 10 to 15 mm; align the positions with structural joints and insulation board joints as much as possible, and do not create a separate set of your own.
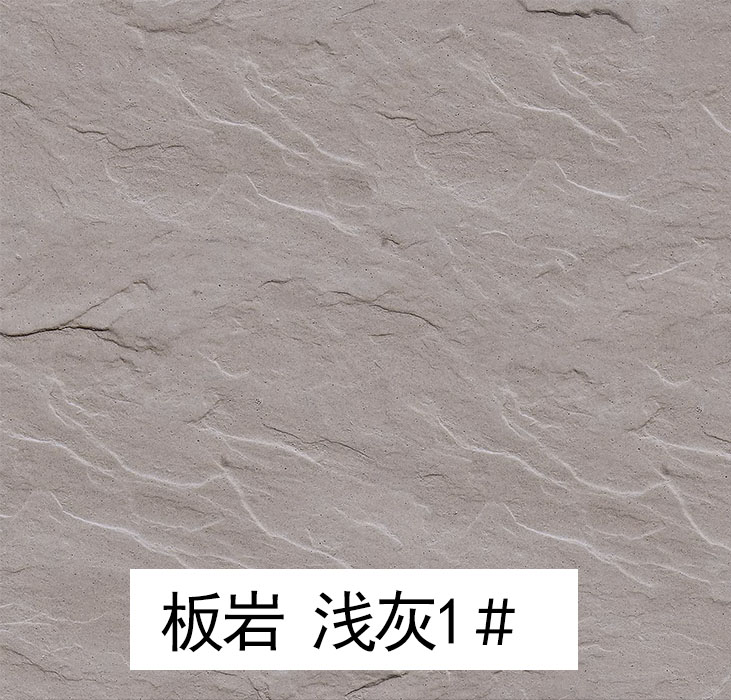
Texture direction must also be clearly marked on the layout drawing. Travertine bedding is horizontal, the veining of wood-grain stone is vertical, and slate emphasizes staggered joints. The direction must be consistent on the same facade, and at corners it must "wrap around"; it cannot suddenly turn a corner there, as that sense of breakage is obvious at a glance.
Before the formal installation, I usually pre-lay a section on the ground at 1:1, number each panel, and photograph it for the record. When installing on the wall, I take the panels according to the numbers, which is efficient and prevents discovering halfway through that the textures do not match up.
Notched trowel: notch depth, angle, consumption
Adhesive is not stronger the thicker it is applied; the key is whether the stripes drawn by the notched trowel can be pressed into full contact during compaction. Notch depth depends on panel size and application location: for conventional panels within 300×600, 6×6 mm notches are sufficient; for large panels of 600×1200 or exterior facades, use 8×8 or even 10×10.
For usage, here is a rough guide: with a 6 mm notch depth, three to four kilograms per square meter; with 8 mm, around five kilograms; with 10 mm, about seven kilograms. This depends on the notch shape, the scraping angle, and the substrate's water absorption. This is only a reference for material preparation; the actual coverage should be determined by breaking open a finished application and inspecting it.
Control the scraping angle at 45 to 60 degrees, scrape one to two square meters at a time, and apply the tile as soon as possible after scraping. On walls exposed to strong summer sun or in windy weather, the open time may be only about ten minutes; once a skin has formed on the surface, it cannot be used, and it must not be mixed with water and stirred to continue using—that skin will become the future hollowing.
For three situations—outdoor use, large panels, and substrates that absorb water quickly—I require double-sided adhesive application: notch-trowel the wall surface, then apply a thin layer to the back of the panel, and after compaction the back coverage must reach more than ninety percent. This step is labor-intensive, but it is the foundation for wind-load resistance and seepage resistance of exterior walls.
The inspection method is crude but effective: after applying three to five pieces, deliberately pry one off to look at the back. If the adhesive is a complete flattened strip with no voids, the technique is correct; if there are only a few isolated spots on the back, the notch depth is insufficient or the piece was not pressed firmly, so adjust immediately rather than waiting until an entire wall is finished.
Panel application and compaction: where do air bubbles come from
In terms of sequence, most crews install from bottom to top. The first course is the datum and must be leveled and aligned; every course above follows it. Some install from top to bottom instead, with the upper course supporting the lower one, provided there is a clear termination line at the top, such as a parapet coping or a string course. Both methods work; the problem is mixing the two on the same wall.
The application motion is "kneading and pressing," not "pressing on." Press the panel down with both hands, shift it sideways by five to ten millimeters, then return it to position to squeeze the air in the middle out to the edges, then tap lightly from the center outward with a rubber mallet. Edges and corners are high-risk areas for hollow spots, so the four corners need two extra taps each.
The adhesive can be adjusted slightly before initial setting, roughly one to two hours at room temperature, and shorter when the temperature is high. If you move it after this window, the adhesive layer has already skinned over, and moving it will leave voids. So after each section is installed, immediately check it with a straightedge; don't wait until the whole surface is done before going back.
In terms of labor efficiency, it is fairly normal for a six-person crew to install sixty to seventy to one hundred square meters per day; this depends on scaffolding conditions, the number of door and window openings, and the panel specifications. With many openings and many closures, efficiency drops by half directly. This must be factored in when scheduling the work; you cannot simply multiply the number of workers by the area for large surfaces.
Keep an eye on the weather. On walls exposed to sun above thirty-five degrees, sprinkle water once to cool down before application; the surface should be moist but without standing water; below five degrees, in rain, or with strong winds above level five, do not apply on exterior walls. These are not fussy details; they are the basic conditions for the adhesive to cure.
Seam width is fixed at the time of installation. Tight-joint installation is controlled at 1 to 2 mm using positioning clips; for the open-joint method, 3 to 5 mm, controlled with spacers. If the seam width varies erratically, no amount of later pointing can save it.
Closings: internal corners, external corners, door and window openings
Internal corners use overlapping, not butt-joining. First apply the long face, letting the board pass the corner by ten to twenty millimeters, then press the short face on top and compact it. Butt-joined seams are most prone to cracking at internal corners, because deformation from both directions squeezes toward this point.
There are three methods for external corners. For thin boards with sufficient toughness, wrap the corner with the whole board; the bending radius must be tested in advance, as too small a radius will cause whitening or even cracking. The second is to add a dedicated corner protector, PVC or aluminum alloy; fix the strip first and then apply, giving straight corner lines, suitable for large volumes. The third is the Haitang corner, leaving a two-millimeter gap on each of the two boards and applying same-color weather-resistant sealant; the result is closest to the chamfered stone effect, but it is labor-intensive.
Door and window openings are the areas most prone to leakage. The sequence is to do the side walls of the opening first, then the main surface, with the side wall panels pressing over the edges of the main surface. Window sills should have a drainage slope of about five percent, and the upper edge should have a drip groove or drip edge; if these two details are not done, rainwater will definitely get into the wall. Leave a gap of five to eight millimeters between the window frame and the panel, insert a PE rod, and apply neutral silicone weatherproof sealant. Apply masking tape before sealing; the sealant must not smear onto the panel surface.
Go through these locations one by one: waistlines, joint grooves, parapet copings, through-wall pipes, and air-conditioning holes. Insert a PE rod into the joint groove before applying sealant; the rod diameter should be two millimeters larger than the groove width so that it rebounds when inserted. The parapet must not be capped directly with panels; use metal or stone copings, and form a drip edge under the coping. For through-wall pipes, install a sleeve first, apply sealant at the pipe root, and leave a gap when cutting the hole in the panel around the sleeve.
I require the crew to take a photo of each completed termination detail and send it to the group chat in the evening. This is not for inspection; it is so that if leakage occurs, we can trace back which step was not done.

Pointing and curing: how long to wait, what to fear
Pointing should wait at least 24 hours; 24 to 48 hours is safer. If the temperature is below 10 degrees, humidity is high, or ventilation is poor, extend to 48 to 72 hours. The criterion is not the clock: press a panel corner with your finger and wiggle it—if there is no displacement, and a light tap with a small hammer gives a solid sound, only then is it bonded. Pointing too early allows water in the pointing agent to seep inward along the uncured bonding layer and soak away the bond strength.
Clean the joints before pointing with a brush and vacuum cleaner; there must be no laitance or debris in the joints. Do not rinse with water, especially on exterior walls—after rinsing, water remains in the joints and the material applied will not bond firmly.
Choose a polymer-modified flexible type of pointing mortar; exterior walls must be weather-resistant. The color should be one to two shades darker than the panel surface so the joint has a shadow effect; using neat white cement paste is the most economical and also the most prone to problems—efflorescence, cracking, and powdering within half a year. Make the joint a recessed joint, one to two millimeters below the panel surface, so rainwater does not easily accumulate at the joint opening.
The prohibitions during the curing period must be posted on the wall, not just stated verbally: protect from rain within 24 hours; within seven days, do not wash with water, do not impact, do not drill holes, do not hang heavy objects, and do not use acidic cleaners such as oxalic acid. In winter or humid weather, the seven days should be extended further. Before scaffold removal, conduct a comprehensive re-inspection; once removed, it will be out of reach.
Acceptance: a small hammer, a two-meter straightedge, a ten-meter distance
Tap each piece with a small hammer for hollowing, focusing on the four corners and the center of the panel. The generally applied on-site criterion is that the hollow area of a single piece must not exceed one-tenth of the panel surface; hollowing is not allowed at the four corners of door and window openings or at internal and external corners; and more than three consecutive hollow pieces must be redone. This item is the most easily skipped and also the most critical—one piece falling from a high-rise exterior wall is an accident.
For flatness and verticality, use a two-meter straightedge plus a feeler gauge, with deviation controlled at two to three millimeters; check the squareness of internal and external corners with a square. Look at the overall surface for the large areas and at workmanship at the edges and corners — problems almost always occur near windows, at corners and around waistlines.
Use a steel ruler to spot-check the joint width; the deviation must not exceed one millimeter. The joint depth must be uniform, and the pointing must be full, with no cracks or air holes. For color difference inspection, step back ten meters and view the entire surface under natural light; do not compare piece by piece on the scaffolding—up close every piece looks normal, but from a distance you may find two panels with an off-color. Also inspect the sunny and shaded sides separately; the same panel can differ by one color grade between the east and west faces.
At the end, carry out one water spray test: select a section of wall that includes a window edge, spray for thirty minutes, then check the back for seepage. For documentation, collect everything: pull-off test reports, concealed works acceptance records, material certificates of conformity and test reports for the corresponding models,Qualifications and testing documentationYou can request them from the manufacturer. The acceptance framework of GB 50210-2018 for finish works still applies; specific allowable deviations shall be implemented according to the project acceptance standards.
Acceptance inspection is not about finding fault; it is about moving the cost of rework forward. Patching a panel while the scaffolding is still up costs a few dozen yuan; patching after the scaffolding is removed costs several thousand yuan, and you also have to depend on the weather. Across the whole process, the first four steps truly determine success or failure: inspect the wall thoroughly, prepare the substrate solidly, snap the lines accurately, and apply the adhesive properly. Everything that follows is the result of these four steps.



 WhatsApp

 Guangdong Public Network Security Preparation No. 44200002005257
