Gilded panel application scheme for lobbies and exhibition spaces: gloss, joint patterns and edge finishing: PT series gilded panel products create decorative variation through different colors and textures; reflection and joints need to be compared under on-site lighting. This page presents a material selection and sample communication plan; the images are not proof of completion for projects already implemented.
| Field | Records |
|---|---|
| Material name | Gilded panel application scheme for lobbies and exhibition spaces: gloss, joint patterns and edge finishing |
| Nature of the content | Application plan prepared based on product information; not an implemented project |
| Image nature | Product texture reference image, not an actual project photo |
| Original record materials | Material selection plan compiled based on the current product center; not an implemented project |
| Comparison of the current catalog | Most Angel、Yinchuan、Rust |
| Material compilation date | 2026-11-09 |
When reading this page, please understand the original project records, current product information and material selection recommendations separately. The original site did not disclose the area, supply batch, construction date, material thickness or on-site test results, and these are not inferred from images; similar products in the current catalog are an entry point for sample inquiries and comparison, and cannot be taken as confirmation of the actual supply model of historical projects. For entries with planning renderings, sand tables or construction-phase images, do not describe them as proof that the entire project has been completed or accepted.
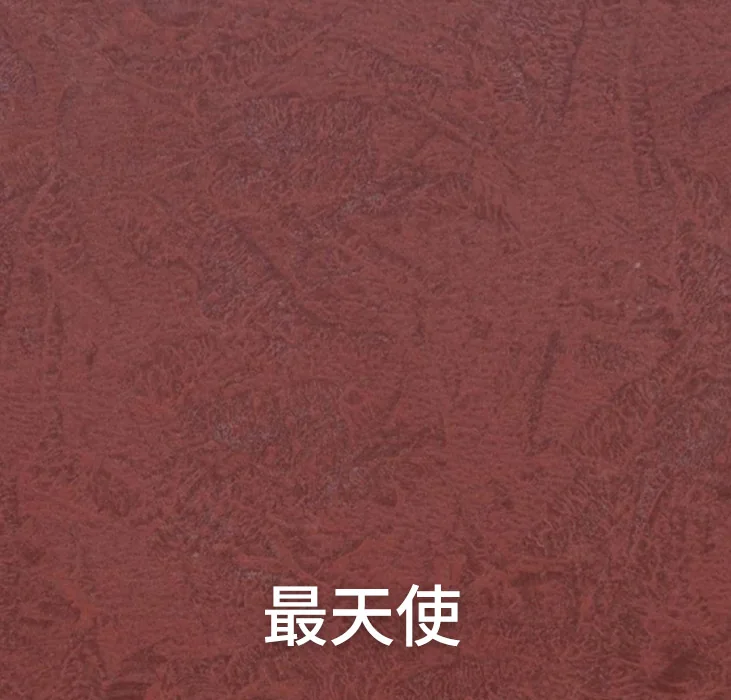
The PT series gilded panel products create decorative variation through different colors and textures, and their reflections and joints need to be compared under on-site lighting. Such images are suitable for first observing the building volume, main colors and finish zones, and then narrowing the focus to the entrance, doors and windows, and adjacent components. Shooting distance, exposure, lighting and obstructions all change how the texture appears; a wall that looks flat in a photo may not use the same material, and a darker area may simply be shadow. The material composition or measured parameters that are not indicated cannot be inferred from the image.
For the same location, it is advisable to prepare far-view, close-up, and detail records at the same time. Far views are used to confirm large-area proportions, close-ups to check texture and joints, and detail records to explain specific practices such as window sills, corners, and top protection. The images currently provided on the original site each have their own observation scope; the captions in this article only describe what can be seen. When judging color, bonding reliability, material grade, or project completion status, samples, drawings, and project records should be checked separately.
This proposal is used for material comparison and sample communication. The accompanying images are product texture references and do not correspond to a project that has already been implemented. At the proposal stage, wall dimensions, application locations, substrate construction, lighting positions and budget boundaries should first be provided, and then the intended series can be determined. Existing product documentation can help narrow the selection range, but actual colors, thicknesses, layouts and delivery conditions still need to be based on confirmed samples and orders. Project addresses, construction areas, customer reviews or completion times that are not provided are not added on this page as actual achievements.
Making the plan into an executable checklist is more helpful for coordination among the designer, purchaser, and installer than showing renderings alone. It is recommended to divide the issues into four groups: visual confirmation, material confirmation, detail confirmation, and delivery confirmation, each with corresponding drawings or records. First use samples to rule out colors and textures that are clearly unsuitable, then decide the method through a mock-up that includes joints, corners, and lighting; do not skip checking the substrate, connection method, and subsequent maintenance just because a product image looks good.
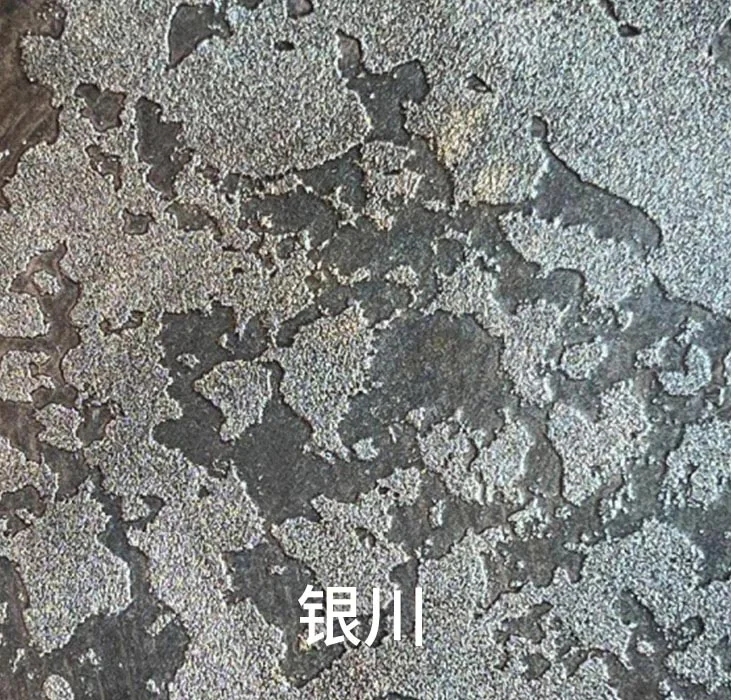

When selecting gilded panel samples, first consider color, grain direction, surface reflection and changes at different viewing angles. The PT, DT and shell carving series in the current product catalog offer different decorative directions, but "gilded" should not be directly understood as a fixed metal composition or fixed structure. For selection, request the substrate, surface treatment, specifications and installation documentation for the corresponding model number, then decide the application location; do not directly write the fire resistance, environmental or weather resistance values from other material reports as parameters of this series.
Lobby and exhibition walls usually have strong directional light sources. For surfaces with gloss or light-dark variation, looking only at a small frontal sample can easily overlook differences in edge reflection and joint direction. It is recommended to place adjacent samples under the planned lighting positions and observe them from the entrance, the reception position and the side, recording texture orientation, joint positions and color sample numbers. If local brightness changes noticeably, first analyze the luminaire positions and viewing angles, then discuss whether to adjust the material, rather than directly using the brightness in renderings as the acceptance standard.
Edge trims, fixing markings and connections to adjacent materials are important components of the gilded panel scheme. The positions of internal and external corners, door frames, skirting and metal lines should be marked on the drawings, and it should be determined whether edges are exposed, what closings are used and how space for access is reserved. The neatness of visible joints needs to work together with substrate precision and the installation method; necessary construction arrangements should not be eliminated in pursuit of so-called completely seamless results. For specific connections, adhesive bonding or other installation methods, the corresponding product documentation and project design shall prevail.
When gilded panels are paired with wood veneer, glass or stone-textured flooring, first select one main color, then compare a small number of candidate styles, rather than covering a small space with multiple high-contrast textures at the same time. After the sign position and main viewing angle are determined, check the sample's reflection and panel division lines, so as to focus attention on the reception information and spatial layering. Whether a specific style is suitable for damp, outdoor or high-frequency contact areas should be verified separately.
| Products | Material description | Application |
|---|---|---|
| Most Angel | FLAT Most Angel gilded panel selection information, belonging to the shell carving series. View product images and textures for this style; dimensions, colors, surface effects and supply requirements are subject to the confirmed sample and order. Products are made to order; when selecting materials, you may contact the manufacturer to verify the technical data, applicable scenarios and delivery time for the corresponding model. | Check the physical item, corresponding specifications and applicable conditions |
| Yinchuan | FLAT Yinchuan Gilded Panel selection information, belonging to the Shell Carving Series. View images and textures of this product; dimensions, colors, surface effects and supply requirements are subject to the confirmed sample and order. Products are made to order; during material selection, you may contact the manufacturer to verify the technical documentation, applicable scenarios and lead time for the corresponding model. | Check the physical item, corresponding specifications and applicable conditions |
| Rust | FLAT Rust Gilded Panel selection information, belonging to the Shell Carving Series. View images and textures of this product; dimensions, colors, surface effects and supply requirements are subject to the confirmed sample and order. Products are made to order; during material selection, you may contact the manufacturer to verify the technical documentation, applicable scenarios and lead time for the corresponding model. | Check the physical item, corresponding specifications and applicable conditions |
Geometric area and actual purchase quantity should be calculated separately. For a single rectangular panel, the nominal area can be calculated as length multiplied by width; millimeter dimensions must be converted to meters. The net finished area should deduct openings that are to be deducted per the design and should account for corners, edge strips, and joints. Pattern matching, rotation, or cutting requirements for different textures may change the usable rate; the waste ratio of one material cannot be copied to all wall surfaces. Before the layout is determined, calculation results can only serve as communication examples.
For example, if only for calculation purposes, assuming the net area to be paved is one hundred square meters and the nominal size of a single piece is six hundred by one thousand two hundred millimeters, then the area of a single piece is zero point seven two square meters, and the theoretical whole-piece count without accounting for cutting and joints should be rounded up to one hundred thirty-nine pieces. This is not the actual usage for this project, nor does it include on-site cutting, spares, and packaging constraints; when actually placing an order, each face should be calculated item by item according to the layout list, and this calculation example should not be applied to strip bricks, coatings, or other specifications.
For coatings, the calculation should be based on the unit-area consumption, system layers and actual application method given in the corresponding product instructions; the panel-count formula should not be used. For transport weight, a distinction must also be made between the net weight per piece, the total net weight of materials and the gross weight including packaging and pallets; where the corresponding data is lacking, it should be requested and verified, and a fixed conversion factor must not be used to produce a seemingly precise transport tonnage. For products whose specifications are not disclosed, this page does not fabricate generic thickness, consumption or packaging parameters.
Color confirmation should be based on actual samples, and the sample number, confirmation date, observation light and application location should be recorded. Photos, screens and printed catalogs are affected by exposure, display settings or paper, so they are suitable for preliminary communication but cannot alone serve as the basis for final color acceptance. It is recommended to observe the confirmed sample together with adjacent floors, doors and windows or trim lines, and where necessary to make a larger-area mock-up to confirm whether there is an obvious difference between the overall appearance and the small sample.
The layout drawing needs to mark the net wall dimensions, starting position, door and window openings, corners, expansion or deformation joints, and interfaces with adjacent materials. For directional textures, the rotation and joining sequence should be indicated; for brick patterns or grid coatings, first check whether the lines can be coordinated and terminated on both sides of doors and windows. Dimension verification should be completed after the constructible substrate has been formed, to avoid treating design nominal dimensions directly as final cutting dimensions.
Substrate inspection should be completed before finish construction. It is necessary to record the substrate material, flatness condition, moisture or dampness, and whether there is loosening, hollowing, powdering, contamination and old coatings. Where cracks and water seepage are involved, the cause should first be identified and treatment implemented; simply covering with a finish layer is not advisable. Whether the substrate meets the requirements of a specific system cannot be judged from a single photo alone; it should be confirmed in combination with on-site inspection, applicable design documents and relevant product technical data.
The choice of auxiliary materials must correspond to the facing material, substrate and application environment. Adhesives, primers, leveling materials, and joint or sealing materials serve different purposes and should not be used interchangeably just because their names are similar. You may require the supplier to provide matching recommendations, usage conditions, construction limitations and corresponding documentation, and verify the specific combination through trial bonding or mock-ups. Parameters such as mixing ratio, open time and curing conditions for actual construction should follow the valid instructions of the product used; this article does not set fixed values that apply across series.
Details should cover at least internal and external corners, window sills and opening edges, wall bases, top edge capping, through-wall pipes and conduits, and connections with other finishes. Water flow paths, drip details and end protection need to be considered at the design stage; all sealing tasks cannot be left to surface coatings or decorative sheets. If there is an insulation layer, special substrate or complex component, the connection and protection methods should be checked separately, and construction should be organized only after a professional has determined the applicable solution.
The construction process can be recorded step by step: substrate acceptance, sample confirmation, layout review, zoned construction, detail treatment, and finished-product protection. After each section is completed, check whether the actual material batch matches the confirmed sample, and verify whether the joint or splice positions conform to the drawings. When the on-site environment does not meet the requirements for the corresponding material, adjust the work schedule; do not omit necessary processes to rush progress, and do not directly use the construction duration of other projects as a delivery commitment for this project.
The purchasing list should itemize by area, material, style number, color, specification, quantity and packaging unit, and be accompanied by layout and sample confirmation records. Quotation comparisons should use a consistent scope, distinguishing responsibilities for surface materials, auxiliary materials, substrate treatment, transportation, installation and acceptance; if different schemes are compared only by the unit price of surface materials, construction and maintenance differences are easily overlooked. Products on this website are produced according to confirmed samples and order requirements; this page does not publish a uniform price divorced from specifications and delivery conditions.
For batch deliveries, it is recommended to record the production batch, receipt date, and installation location corresponding to each building or wall zone, and to use confirmed batches for the same continuous visible area as far as possible. The quantity and storage method of reserved materials should be agreed in the order; a fixed percentage must not be used directly in place of layout calculations. Upon arrival, first check packaging, markings, quantity, appearance, and random samples, then handle anomaly records according to the agreement between both parties, to avoid losing traceability after unpacking and mixing.
Acceptance needs to distinguish three levels: visual effect, material delivery, and construction quality. Color and texture should be compared with the confirmed sample; quantity and specifications should be checked against the order and delivery records; and the substrate, bonding, nodes, and protection should be inspected according to the applicable requirements. Photos can serve as process records, but they cannot replace necessary on-site testing, nor can sample laboratory reports directly prove that the entire building has achieved the same on-site performance. For indicators not covered by the test methods and scope, this should be stated truthfully.
The maintenance plan should be handed over before use, including permitted cleaning methods, chemicals or tools to avoid, inspection methods after impact, and color-difference handling for local repairs. For the first cleaning, try it first in an inconspicuous area and follow the specific product instructions; the same cleaning results cannot be promised for all textures. If problems such as cracking, hollowing, water seepage, or loose components occur, identify the cause first and then decide the scope of treatment; it is not advisable to merely cover the surface and consider the problem resolved.
It is recommended to archive the final delivery documents in four groups: confirmed samples and layout drawings, product and auxiliary material documents, construction process and inspection records, and maintenance and replenishment information. Each area should preferably be traceable to the corresponding batch and method, so that when repair needs arise later, records can be checked first and samples requested afterward, reducing color-matching deviations based on memory alone. The purpose of project documents is to explain the methods already confirmed, not to fill in data that was not measured or provided and present it as a polished engineering achievement.
For cross-regional projects, the actual environment and conditions of use should be added, for example whether the project is outdoors, whether it is exposed to rain, and whether there are salt-spray or frequent-cleaning requirements. For export procurement, product technical requirements, English safety data and transport documents also need to be checked separately; an appraisal for handling sea freight as non-restricted cargo does not mean the material has obtained building-use approval in the destination country. Domestic and overseas testing systems cannot be treated as directly equivalent merely because the grade names are similar; communication should be based on the documents actually adopted and their scope of application.
| Documentation | Information that can be supported | Conclusions that cannot be directly derived |
|---|---|---|
| Product details and confirmation samples | Corresponding style, texture, specifications and agreed delivery requirements | Cannot prove that historical projects actually used the same product |
| Corresponding test report | Samples, standards, conditions and results stated in the report | Cannot prove the on-site performance of the entire building. |
| Construction drawings and acceptance records | Design approach, actual inspection, and delivery scope | Cannot be replaced by renderings |
| MSDS and transport assessment | For corresponding material safety information or transport review purposes | Not building access certification for all countries and regions |
Sources include the original project descriptions and photographs on this website, current product pages, and company-supplied specifications and original test reports. The material was compiled on November ninth, two thousand and twenty-six. Project identities and quantities are recorded only as stated in the available documents; missing independent measurements or delivery records have not been presented as verified project achievements. Consult the original documents for performance data, certificate scope and report purpose, and confirm them alongside the sample, order and project specifications.
This page presents material application schemes; the images are product texture references and do not serve as proof of completed projects, supply records, or on-site testing.

Obtain material selection plan and quotation
Engineering Cooperation · Import and Export Purchase
 WhatsApp+86 177 2848 9576
overseas procurement consultation · Export inquiries

Make architecture more beautiful.
Focus on flexible stone (MCM soft stone/soft porcelain), providing texture selection, product information and order production coordination.
Copyright © 2012-2026 Guangdong Fulaite Building Materials Co., Ltd. All Rights Reserved Yue ICP No. 16084041
Headquarters Address:No. 2, West of Tong'an Avenue, Dongfeng Town, Zhongshan City, Guangdong Province Guangdong Public Network Security Preparation No. 44200002005257




